Is a Worn Flapper Why Your Toilet Keeps Running?
Your toilet has started running (just in time for family to visit for the holidays), but don’t panic. More often than not, it’s a very simple fix. If you’ve already eliminated other possibilities, we’re going to walk you through how to replace a toilet flapper — the most common solution to how to fix a running toilet and stop a toilet that keeps running for good.
How To Replace the Flapper on a Toilet — Step by Step
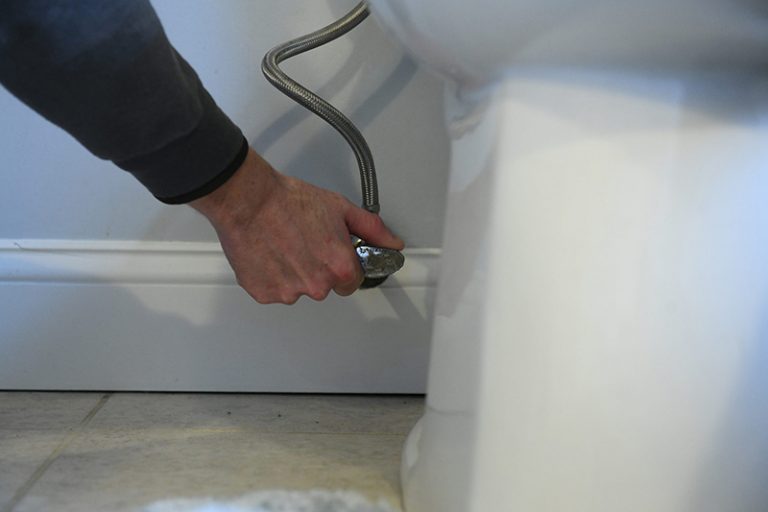
Step 1 — Turn Off the Water to the Toilet
Close the shutoff valve by turning it clockwise until it stops, then drain the toilet tank by flushing the toilet.
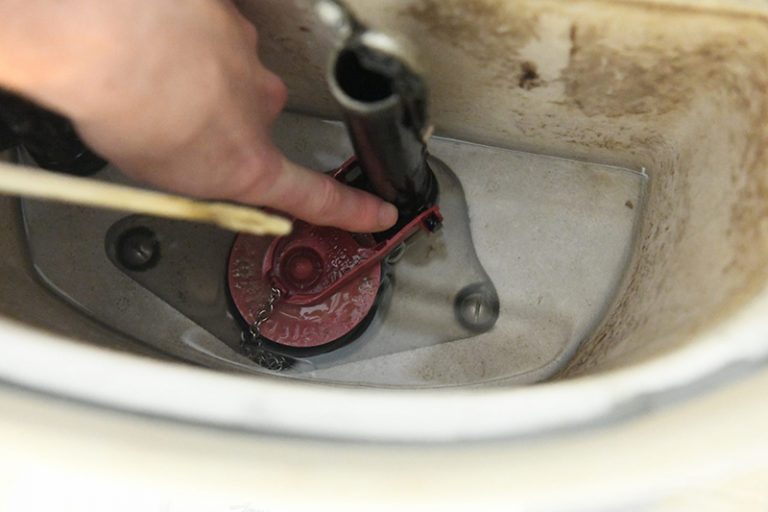
Step 2 — Remove the Old Flapper
Disconnect the flapper chain from the flush handle lever. There is usually a small clip on the top end of the chain that hooks into one of the holes on the handle lever. Undo the clip and let the chain drop. Slip the side ears of the flapper off of the pegs that extend from the sides of the flush valve tube.
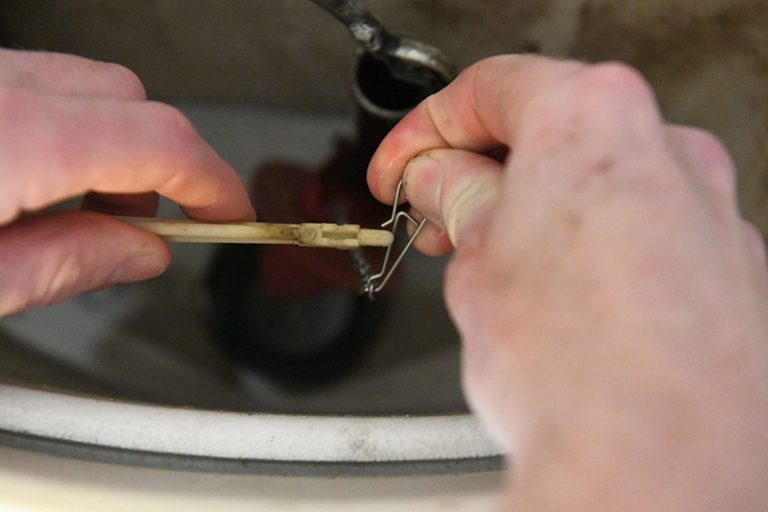
Step 3 — Install New Flapper
Hook each ear of the replacement toilet flapper valve onto one of the pegs on the sides of the flush valve. Connect the flapper chain onto the handle lever, adjusting the chain length as needed. When the handle lever is in the resting position, the chain should be relaxed, with a little bit of slack.
⚠️ Note — Toilet Flapper Chain Adjustment: Proper toilet flapper chain adjustment is critical to a successful repair. If the chain is too tight, the flapper may not close completely — causing a toilet flapper leaking issue that keeps the toilet running. If the chain has too much slack, it can get caught under the flapper and prevent it from fully seating in the flush valve opening.
Step 4 — Turn Water Back On
Turn the water back on by turning the shutoff valve counterclockwise all the way. Test the new flapper and the chain length by flushing a couple of times and watching the flapper go up and down.
A Under-$10 Fix That Stops Your Toilet From Running
You can make this simple toilet flapper replacement repair for under $10 — the cheapest thing you’ll buy this holiday season! Knowing how to replace a toilet flapper means you can fix a running toilet yourself in under 20 minutes, without calling a plumber, and without spending more than the cost of the part.